Home DIY Projects

Get inspired with creative DIY projects that add character, color and personality to your home and garden. From furniture makeovers to custom finishes, these hands-on ideas will help you transform everyday spaces and objects into something unique.

You’ll find guides like turning a rusty filing cabinet into garden tool storage, creating faux aged brick with authentic charm, or painting Van Gogh’s Starry Night on an old fence. Inside, explore projects such as DIY faux shiplap walls, refinishing hardwood floors, mixing and matching furniture pieces and a bold dresser makeover.

  • Replacing an interior door knob with a vintage one

    This will help you out with replacing a newer style door knob with one of those super cute looking vintage door knobs. This will also help anyone who purchased a doorknob from Anthropologie — they have fantastic looking knobs, but don’t inform you on how to install these knobs. There is additional hardware you’ll need to buy for the Anthropologie knobs, because unfortunately your existing modern latches will not fit the older square spindle that comes with these types of knobs. Anyway, have no fear, I will help get you through it! Step 1: Purchase hardware You’ll need to order some hardware, and most of it can only be found online. Here I’ll give you links to what you need: Want the Whole Retrofit Kit? This…

  • Rusty Wrought Iron Remedy

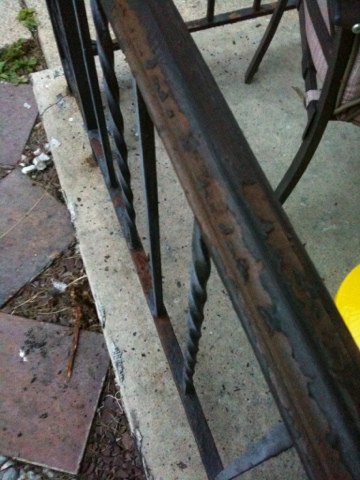
    So, my next outdoor project is repainting my rusty wrought iron railing around my front porch. Here are my instructions on what to do: Scrub the wrought iron with a steel wire brush. This will remove any loose or flaking rust. I used a brush from Sherwin Williams with a little “ice scraper” attachment at the end of it. I used this little plastic piece to tap away at the rust and paint chips so they were easier to brush off. Sand the wrought iron with electric drill attachements, such as a sandpaper disc or wire wheel to further remove rust. Begin by using a coarse sandpaper to remove deeper rust. Go over the wrought iron with a medium-grit sandpaper. If necessary, mix a solution…

  • My house has LIPSTICK! Learn how easy it is to paint your foundation!

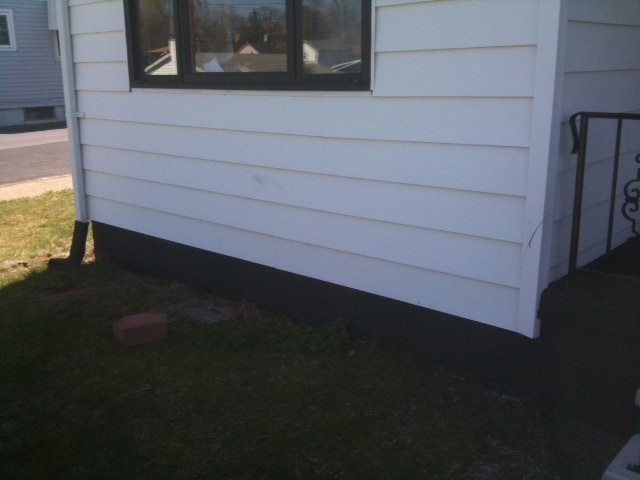
    This weekend I was finally able to paint the foundation… or as I like to say “apply lipstick” to my house. If you read my post about painting the window trim and my house wearing “eyeliner” you will get where I’m going with this! My house has black lipstick, so I guess she’s in her goth stage… In the aforementioned post, I went over the steps that we took to parge the foundation. The concrete was chipping off, and making the surface uneven, so parging it with concrete smoothed the surface. It took about a week and a half to cure… I knew it was ready when the concrete lightened up and all turned the same color. Painting the foundation is just like painting anything…

  • How to Clean an Unfinished Basement Ceiling the Easy Way

    Today was a very busy day, even though not much progress can be seen. The goal of the weekend is to tackle the unfinished basement. I’m having a housewarming/St. Patrick’s Day party next weekend, and this is the party zone. Here’s our checklist: Clear the cobwebs. The entire basement just needs a whole lotta TLC. My first job was to clear the cobwebs off the rafters. I started with a duster, then moved to a wet rag, and finally settled on using the shop vac to clear the cobbys. This ended up being the fastest easiest way to get rid of them… plus I got to sing Lionel Richie’s “Dancing on the Ceiling” while I did it. Win win. Even out the floor. There are…

  • My house is wearing eyeliner!!

    What a long day it was! My FAVORITE update, though, has to be the black paint we used for the window and door frames. I struggled with this, as the peeling paint I was covering was white. But the house was just screaming for something different. I thought that the black paint would go well with the wrought iron railing, and soon-t0-be-painted black foundation, and black roof. It looks amazing. I’m so happy with it. Like my house is wearing eye-liner! Isn’t she pretty? In addition to the trim paint, we also parged the foundation (the darker color to the right of the steps is actually wet concrete). This is basically just like putting frosting on a cake… it evens out the bumps and chips….