
Please note: I may earn commissions from qualifying purchases if you shop through links on this page. More info.
How to Create a Charming River Rock Path in Your Backyard

If you’ve ever dreamt of adding a unique touch to your garden with a charming river rock pathway, you’re in the right place. Inspired by some gorgeous images I saw on Pinterest, I embarked on this DIY project. And, let me tell you… it’s been a journey of learning, adapting and, yes, a bit of stumbling along the way.
But that’s what DIY is all about, right? I’m excited to share every step, tip and oopsie with you, so let’s dive in!
If you’d rather watch than read, check out the YouTube video I made about this entire project!
Subscribe to my YouTube channel for more gardening videos!
Materials You’ll Need
- Rope or length of hose to lay out the path
- River rocks (I got mine locally and used 3-6″ natural round stone)
- Concrete mix (like Quickrete) and paver sand (a 2:1 ratio worked for me)
- Water
- Flexible Paver Edging | Buy on Amazon
- Nylon Spikes | Buy on Amazon
- Basic tools (shovel, hammer, bucket, trowel, gloves, sturdy shoes—safety first!)
- Propane Torch Weed Burner (not just cool-looking, but super practical for maintenance) | Buy on Amazon
- Leaf blower (another great tool for maintenance) | Buy on Amazon
Step-by-Step Guide to Creating Your River Rock Pathway
Gather Inspiration

The first thing I did was gather some inspiration photos to get me started. Although I couldn’t find any “how to” articles for exactly how to create the walkways and paths I was finding, it did give me a starting point for how I wanted the walkway to look.
Plan Your Path

Kick things off by deciding where you want your pathway. I like using a piece of red rope to mark the layout—it helps visualize the path’s trajectory and shape.
Think about the width too; mine’s about 2.5 feet wide for a cozy, intimate feel, though standard walkways are typically closer to 5 feet. This initial step is crucial as it sets the stage for everything that follows.
Choose Your Materials

For this project, I used natural round stones that I was able to find locally at a garden center. I started by using 1-1/2-3″ Natural Round Stone, but actually found these to be too small and thin.
The thicker, 3-6″ Natural Round Stone worked out better for this project. These gave me a larger surface to work with and made the path more stable.

Prepare the Base
Once you’ve marked your path, it’s time to prepare the base. Clear any grass and debris from the pathway area. Lay down a solid foundation of sand and concrete mix—aim for a base depth of about 3-4″. This doesn’t require deep digging; you can build up from the ground, which is perfect if you’re not into heavy excavation.

My process for this was to mix 2 parts paver sand to 1 part concrete mix to get a peanut butter consistency. Make sure that your concrete mix doesn’t ALREADY have sand in the mixture. If it does, you will need a different ratio (less sand to concrete mix).
You want this mix to be on the dry side. But, loose enough to “squish” the stones into it a little bit so you can use the base to naturally level the stones.
I found the most success in only preparing a small area with this base mixture at a time. You don’t want to put too much down and have it harden before you can lay the stones for your walkway. So, I found it best to work in a small area (about 1-2′ at a time) to not get overwhelmed.
Free Guide: 13 Pro Garden Design Tips

Unlock the secrets to a stunning garden with my free guide: 13 Pro Garden Design Tips! From creating flow and balance to choosing the perfect plants, these expert tips will help you transform your outdoor space with ease. Download now to get started!
Lay the Stones
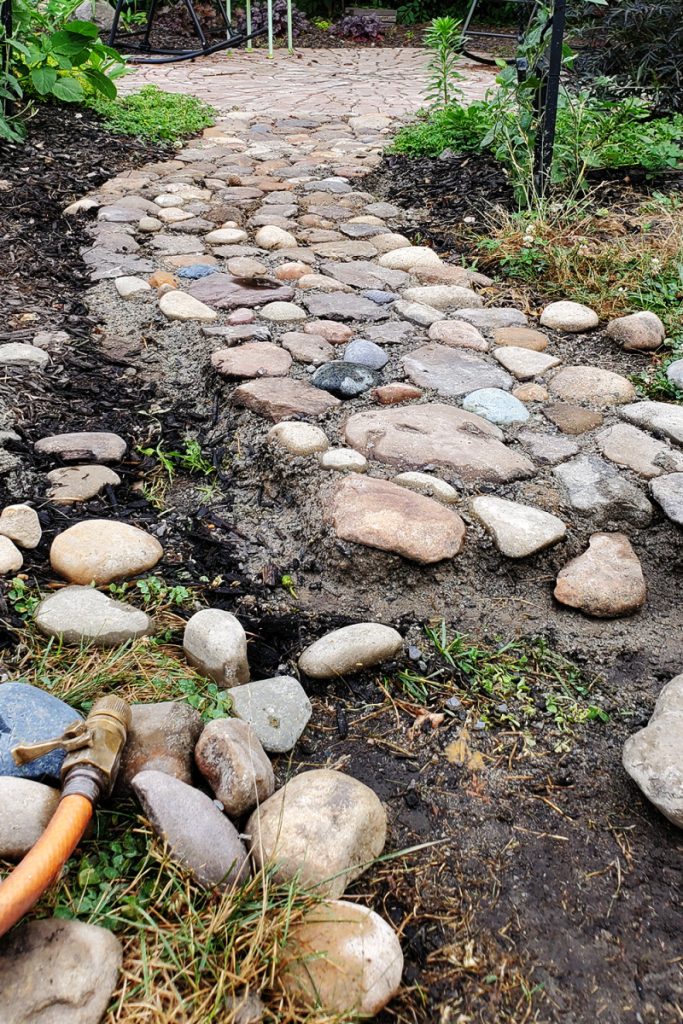
Now for the fun part—placing the stones! Choose the flattest part of the stone to be on top. Lay your river rocks one by one, squishing or pressing them into the wet concrete base.
Think of it as a jigsaw puzzle where each stone is a piece. Aim for consistent spacing between the stones as much as possible. Opt for flat stones that are substantial enough to ensure stability.
Smooth out the concrete mixture that squishes up between the stones as you work. This can be used as “grout” to hold your stones in place in lieu of using polymeric sand later.
There’s no need to rush this part; taking your time here really pays off in the end.
As you finish a small section, mix more of the base and then continue. I worked on this project over the course of several weeks as I had time (after work and on the weekends). By only working on a small portion at once, it gave me the flexibility to work at my own pace when I had time!
It also makes this a great project to add to in years to come. You can just keep extending your path and have it seamlessly tie together.
Secure the Edges

After all the stones are laid, it’s time to secure the edges with paver edging (this is what I used). I think secured the edging to the ground using these nylon paver spikes.
This step is vital as it prevents the stones from shifting and keeps your pathway well-defined and tidy. It’s a simple addition that makes a big difference in maintaining the pathway’s structure over time.
And, just so you know, I did not add edging when I originally created this walkway. Over time, the stones near the edges of the path began to crumble off. So, the next year, I added the plastic edging and redid parts of the walkway that crumbled. Because of this, I’d highly recommend using edging from the start to save yourself the extra effort next season!
Final Result
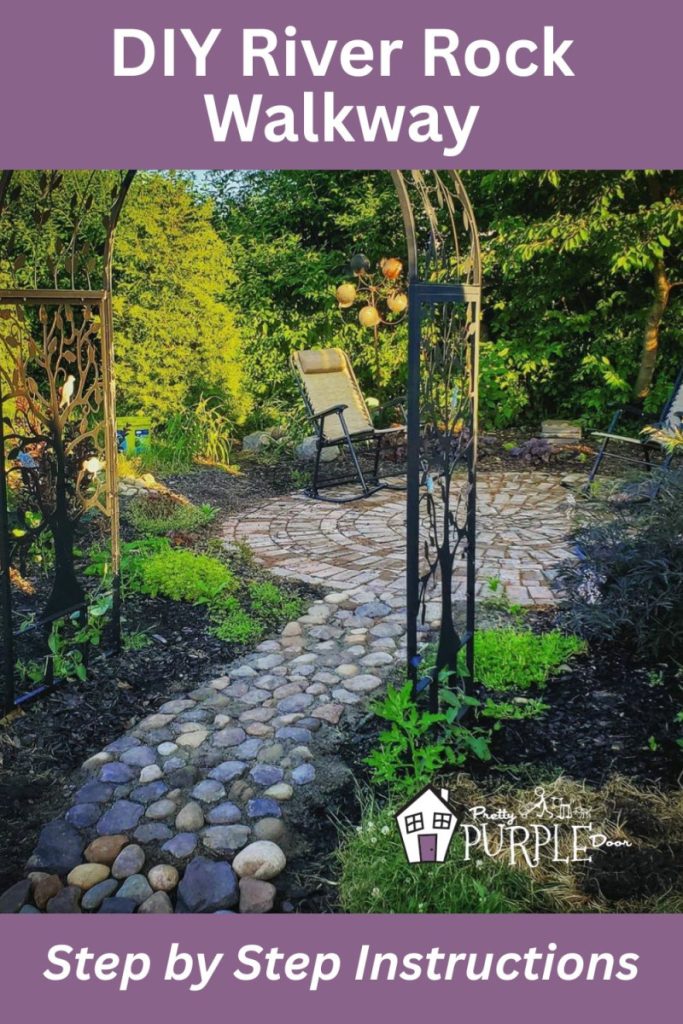
Here are some photos of my DIY river rock pathway, once complete!

Pros and Cons of a River Rock Pathway:
Pros:
- Doesn’t need to be level, which is great for uneven landscapes.
- Less digging required than a traditional pathway.
- Flexible project size—you can start small and expand later.
- Highly unique and visually appealing.
Cons:
- Not stable enough for those with mobility issues.
- More labor-intensive due to the size and shape of the stones.
- Weeding can be challenging due to larger gaps between stones.
- Difficult to clean sand or concrete mix off the porous stones.
What I Would Do Differently
Reflecting on this project, there are definitely a few things I’d tweak if I were to do it all over again. While the pathway turned out beautifully, it wasn’t without its learning curves and here’s how I’d smooth them out:
Opt for Thicker, Flat-Sided Stones

In my initial attempt, I went for thinner stones, thinking they’d be easier to handle and lay. However, I quickly realized that thicker stones with at least one flat side provide much better stability and less movement over time. These stones not only sit more securely in the sand-concrete mix but also resist shifting underfoot, which is crucial for a walkway that sees regular use.
Use a Consistent Sand-to-Concrete Ratio
Consistency is key when mixing your base. I learned that the hard way! I got lazy and started to ‘eyeball’ the amount of sand vs. concrete. This lead to areas of the walkway that were great. And, other areas that were not stable and the stones began to pop out.
Inconsistent mixing can lead to problem areas in your walkway. Next time, I’d stick to a strict ratio to ensure the entire pathway has a uniform firmness. This would enhance both the durability and the appearance of the finished path.
Apply Paver Edging Immediately
I originally added the paver edging a season too late, which allowed some of the edges to crumble and shift. Applying edging right from the start helps to firmly lock everything in place and prevents erosion along the pathway’s borders. It’s a simple step that can significantly extend the life and maintain the neat appearance of your pathway.
Avoid Polymeric Sand

While polymeric sand is often recommended for filling gaps between pavers, I found it tricky to work with, especially when trying to clean it off the porous surfaces of the river rocks. It can stick and leave a residue that’s tough to remove.
If I were to do this project again, I would skip the polymeric sand. Instead, I’d focus on “squishing” the stones into the concrete/sand mixture and use that as the grout between the stones to hold them in place. It would eliminate the need for polymeric sand altogther and I think this would work better.
You could also fill the cracks between the stones with a living groundcover like creeping thyme in sun or Irish moss in shade (which is what I’m currently using).
By implementing these changes, I believe the project would not only go smoother, but also result in a pathway that’s just as beautiful and even easier to maintain. I hope this helps you avoid some of the pitfalls I encountered, making your DIY experience a bit easier and a lot more fun!
Maintain the River Rock Walkway
Maintaining your river rock pathway does require regular attention to keep it looking its best. This walkway, while charming and beautiful, DOES require a fair amount of maintenance to stay in top shape. The effort is well worth it, though, as it keeps your garden path functional and attractive throughout the seasons.
Here’s how to effectively manage it:
Weeding

Regular weeding is crucial. And, that’s where the weeding torch comes in really handy. It’s an excellent tool for quickly zapping weeds that sprout up between the rocks. Fire up the torch and tackle those weeds—aside from being effective, it’s quite satisfying to see them burn away.
I’ve found that trying to pull weeds from the cracks can lift the stones and create more problems/necessary repairs. So, I always stick with the torch now. I also started adding some Irish Moss in between the stones. This, over time, will reduce the amount of weed pressure in between the stones and give the path an even more natural and aged look.
Irish Moss is a groundcover that will grow between your stones. It grows great in shady areas and is what I’m using on my path (you can see this in the photo above). If your walkway is in a full-sun area, you may need to choose something else; like Creeping Thyme.
Clearing Debris
A leaf blower is indispensable for keeping your pathway clear of fallen leaves and other debris. I use this one by the brand EGO and I like it a lot, if you’re in the market for one. It’s especially helpful during the autumn months or after storms when leaves and other debris tend to accumulate. A quick blow-over can save a lot of sweeping time and keep your path looking neat. This also reduces the amount of weeds that can grow in between the cracks of the cobblestones.
Would I Try This Project Again?
In all honesty, no I would not do this again. I really LOVE the way it turned out, but I find that the maintenance is hard to keep up with. And, I made a lot of mistakes along the way that need correcting.
I don’t think this was a BAD project or something you shouldn’t try at home if you love the look. It just isn’t meeting my personal criteria for a low maintenance landscape. I plan to remove this for something more stable; like a brick walkway.
Wrapping Up
Creating a river rock pathway is a rewarding project that can transform the aesthetics of your garden. Although it comes with its set of challenges, the beauty and satisfaction of completing this DIY project are well worth the effort if you like what you see in this post.
Don’t forget to watch the whole STEP-BY-STEP VIDEO of this project along with my thoughts on what I’d do differently.
Remember, every stone laid is a step towards creating your unique landscape sanctuary. Happy Gardening!
More DIY Posts You’ll Love
- How to Start Seeds Without Wasting Time or Space
 This seed starting guide walks you through planning seeds step by step, including layout, timing and spacing, so seed starting feels clearer and calmer.
 - 14 Budget-Friendly Landscaping Tips to Save Money
 Design your dream landscape on a budget with these cost-saving tips that won’t sacrifice style or curb appeal.
 - How to Create a Charming River Rock Path in Your BackyardLearn how to create a beautiful DIY river rock garden path with cobblestones. This complete step-by-step guide will help you build the walkway of your dreams.